Has your once-mighty electric toothbrush started to sputter, losing its powerful hum and leaving your teeth feeling less than perfectly clean? You’re not alone. A fading battery is a common culprit behind declining performance, but it doesn’t always mean your beloved brushing companion is destined for the landfill. In this comprehensive guide, we’ll walk you through everything you need to know about electric toothbrush batteries, from understanding their types and benefits to a detailed, step-by-step process for How To Change The Battery In Your Electric Toothbrush, breathing new life into your daily oral care routine.
What is an Electric Toothbrush?
An electric toothbrush is an advanced oral hygiene device that uses motor-driven vibrations or rotations to clean teeth more effectively than manual brushing. These devices simplify the brushing process, making it easier to achieve a consistent, thorough clean across all tooth surfaces. At their core, electric toothbrushes rely on a power source, typically a rechargeable battery, to drive their sophisticated cleaning mechanisms, which is why understanding and maintaining this internal power is key to long-term performance.
The concept of powered toothbrushes dates back to the 1930s, but they became widely accessible in the latter half of the 20th century. Early models were quite basic, often relying on simple rotational movements. Today, they incorporate various technologies, including oscillating-rotating and sonic vibrations, designed for superior plaque removal and gum health.
The Remarkable Benefits of Electric Toothbrushes
Switching to an electric toothbrush offers a multitude of advantages over traditional manual brushing. Their inherent design and technology contribute to a more effective and efficient cleaning experience.
Firstly, electric toothbrushes are significantly more effective at plaque removal. Studies consistently show that they can remove substantially more plaque and reduce gingivitis more efficiently than manual brushes, leading to healthier gums and a brighter smile. This superior cleaning power stems from thousands of brush strokes per minute, far exceeding what manual brushing can achieve.
Beyond superior plaque removal, electric toothbrushes contribute to overall oral health in several ways. Many models feature built-in timers to ensure you brush for the dentist-recommended two minutes, and pressure sensors to prevent brushing too hard, protecting your gums and enamel from damage. For individuals with limited dexterity, such as those with arthritis or certain disabilities, the ease of use of an electric toothbrush makes maintaining optimal oral hygiene much more manageable. Their consistent performance also aids in reducing surface stains, contributing to naturally whiter teeth over time.
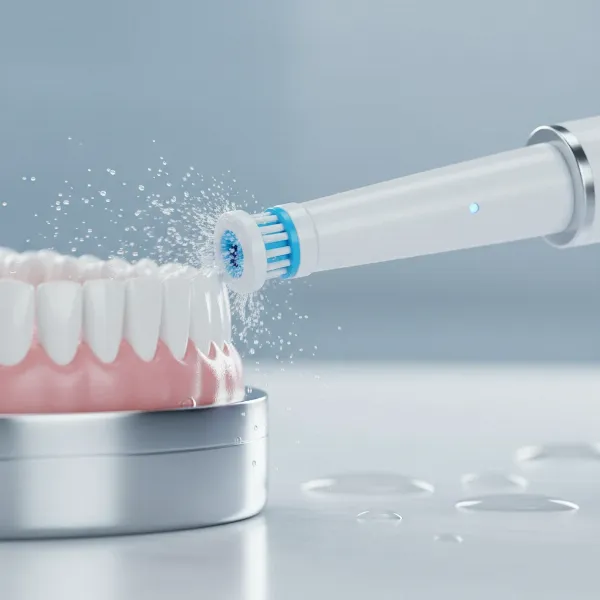 An electric toothbrush effectively cleaning teeth and gums for superior oral hygiene
Understanding Electric Toothbrush Types: Beyond the Bristles
When exploring the world of electric toothbrushes, you’ll encounter a variety of technologies, each offering a distinct cleaning experience. These differences not only impact how they clean but also the type of battery they utilize and, consequently, the complexity of battery replacement.
Oscillating-Rotating Electric Toothbrushes
These toothbrushes, commonly associated with brands like Oral-B, feature small, round brush heads that oscillate (rotate side-to-side) and pulsate to break up and sweep away plaque.
- Advantages: Generally more affordable, widely available, and highly effective for plaque removal with their mechanical action.
- Disadvantages: The strong rotational movement can feel intense for some users, and the noise level might be higher. They often use rechargeable Ni-MH (Nickel-Metal Hydride) batteries, which may require soldering for replacement.
|
Our Picks for the Best Electric Toothbrush in 2026
As an Amazon Associate I earn from qualifying purchases.
|
||
| Num | Product | Action |
|---|---|---|
| 1 | Oral-B iO Simple Clean Rechargeable Electric Powered Toothbrush, Night Black with 1 Gentle Care Brush Head and 1 Black Travel Case - Automatic Pressure Sensor to Protect Gums - 3 Modes - 2 Min Timer |

|
| 2 | Philips Sonicare 4100 Rechargeable Electric Toothbrush, Advanced Plaque Removal, Pressure Sensor, Includes Brush Head Case, White BD5002AZ |
|
| 3 | COSLUS Sonic Electric Toothbrush for Adults C40(DY-108Pro): 47000 VPM for Deep Cleaning with Travel Case - 5 Modes for Sensitive Teeth & Brace, Wireless Charging, 6 Brush Heads for Family, Black (1PC) |
|
| 4 | Philips Sonicare 1100 Series Electric Toothbrush - Sonic Toothbrush with Advanced Sonic Technology, EasyStart, Smartimer & Quadpacer, White, Model HX3641/02 |
|
| 5 | Oral-B iO Simple Clean Rechargeable Electric Powered Toothbrush, Pure White with 1 Gentle Care Brush Head and 1 White Travel Case - Automatic Pressure Sensor to Protect Gums - 3 Modes -2 Min Timer |
|
| 6 | Oral-B Pro 1000 Rechargeable Electric Toothbrush, White |
|
| 7 | Philips Sonicare 4100 Series Electric Toothbrush - Sonic Toothbrush with Advanced Sonic Technology, Pressure Sensor, Two Intensity Settings, Smartimer & Quadpacer, Deep Pink, Model HX3681/26 |
|
| 8 | Philips Sonicare 2100 Series Electric Toothbrush - Sonic Toothbrush with Advanced Sonic Technology, Two Intensity Settings, Smartimer & Quadpacer, White, Model HX3661/04 |
|
| 9 | Oral-B Pro 1000 Rechargeable Electric Toothbrush, Black |
|
| 10 | Onlyone Sonic Electric Toothbrush for Adults, Rechargeable Ultrasonic Electric Toothbrush with 8 Brush Heads, Travel Case, Charging Base & Wireless Charging - 5 Modes with Smart Timer |
|
Sonic Electric Toothbrushes
Popularized by brands like Philips Sonicare, sonic toothbrushes use high-frequency, wide-amplitude vibrations to clean teeth. These vibrations create dynamic fluid action, driving toothpaste and water between teeth and along the gumline.
- Advantages: Offer a gentler cleaning experience, quieter operation, and effective cleaning even beyond where the bristles physically touch. Many models boast advanced features like multiple brushing modes and smart connectivity.
- Disadvantages: Typically higher priced than oscillating-rotating models. They often contain Lithium-ion (Li-ion) batteries, which are powerful but also usually soldered in, making DIY replacement a delicate task. Some simpler sonic models, like the Philips One, use easily replaceable AAA alkaline batteries.
Ultrasonic Electric Toothbrushes
Operating at frequencies beyond the range of human hearing, ultrasonic toothbrushes use extremely high-frequency vibrations to disrupt bacterial chains and remove plaque.
- Advantages: Represent the cutting edge of cleaning technology, offering exceptionally gentle and effective cleaning that reaches deep below the gumline.
- Disadvantages: The most expensive category, and less common in the general market. Their advanced internal components mean battery replacement is almost exclusively a professional task, if at all possible.
Comparing Electric Toothbrush Types
Understanding the nuances between different electric toothbrush technologies can help you make an informed choice, especially when considering factors like battery life and potential for replacement.
| Feature | Oscillating-Rotating | Sonic | Ultrasonic |
|---|---|---|---|
| Cleaning Action | Rotates & Pulsates | High-frequency Vibrations | Ultra-high Freq. Vibrations |
| Plaque Removal | Very Good | Excellent | Superior |
| Feel | Mechanical, intense | Gentle, vibrating | Extremely gentle |
| Noise Level | Moderate to High | Low | Silent (inaudible) |
| Common Battery Type | Ni-MH, sometimes Li-ion | Li-ion, some AAA (disposable) | Li-ion (internal) |
| Battery Replaceability | Often requires soldering | Varies (AAA easy, Li-ion soldering) | Typically professional only |
| Price Range | Affordable to Mid-range | Mid-range to High-end | Premium / Very High |
| Key Brands | Oral-B | Philips Sonicare, Laifen | Emmi-dent |
How to Choose the Right Electric Toothbrush
Selecting the ideal electric toothbrush involves balancing your personal needs, oral health goals, and budget. While the initial choice might focus on cleaning effectiveness, considering the lifespan and maintainability of its power source is a smart long-term strategy.
First, establish your budget. Electric toothbrushes range widely in price, from basic models under $50 to advanced smart brushes costing several hundred dollars. Knowing your price comfort zone will narrow down your options significantly.
Next, consider the cleaning technology that best suits your preferences and sensitivity. If you appreciate a powerful, scrub-like feel, an oscillating-rotating brush might be ideal. If you prefer a gentler, yet highly effective, experience, a sonic brush could be a better fit. Look for features that address your specific oral health concerns, such as pressure sensors for sensitive gums or multiple brushing modes for different needs.
Battery type and longevity are crucial considerations. If the idea of internal battery replacement seems daunting, look for models that use easily replaceable AAA batteries or consider a toothbrush with a robust, long-lasting Li-ion battery, even if it’s not user-serviceable. Reputable brands often provide clear information on their battery life expectations.
Finally, research brush head options compatible with your chosen model. You’ll want heads tailored to your specific needs, whether for sensitive teeth, whitening, or deep cleaning. Always prioritize trusted brands known for their quality and customer support. Don’t hesitate to read user reviews for real-world insights into a toothbrush’s performance, battery life, and overall user satisfaction before making your final decision.
The Ultimate DIY Guide: How to Change Your Electric Toothbrush Battery
When your electric toothbrush starts losing its charge quickly or feels sluggish, it’s a clear sign its battery might be nearing the end of its life. While some manufacturers discourage DIY battery replacement due to warranty implications or technical complexity, it’s often a feasible and rewarding project for the mechanically inclined, extending the life of your device and reducing electronic waste.
Important Precaution: Attempting a DIY battery replacement will almost certainly void your toothbrush’s warranty. Proceed with caution and only if you are comfortable with small electronics and potentially soldering.
Tools You’ll Likely Need:
- Small Flathead Screwdriver or Prying Tool: To open the casing.
- Small Adjustable Spanner (for some Oral-B models): To twist off the base.
- Soldering Iron and Solder (for rechargeable models): Essential for detaching and reattaching battery terminals.
- Desoldering Pump or Braid (optional but recommended): To remove old solder cleanly.
- Precision Screwdrivers (various sizes): For internal screws.
- Compatible Replacement Battery: Crucially, this must match the original’s voltage, dimensions, and chemistry (Ni-MH or Li-ion), often with soldering tabs pre-attached.
- Tweezers or Small Pliers: For handling small components.
- Small Tray or Container: To keep tiny screws and parts organized.
- Safety Glasses and Gloves: Always wear appropriate personal protective equipment.
 Essential tools for DIY electric toothbrush battery replacement laid out neatly
Step-by-Step Battery Replacement Guide (General for Internal Rechargeable Models):
-
Preparation is Key:
- Ensure your toothbrush is completely powered off and unplugged from its charger.
- Work on a clean, well-lit surface. Gather all your tools and the new battery.
- Identify your toothbrush model number, usually found on the bottom of the handle. This is vital for finding the correct replacement battery.
-
Disassemble the Toothbrush Handle:
- Remove the Brush Head: Always detach the brush head first.
- Opening the Casing (Methods vary by brand and model):
- Oral-B Vitality/Pro Series: Some models have a base cap that twists off (use an adjustable spanner or strong grip, turning counter-clockwise about 30 degrees). Others might require careful prying with a flathead screwdriver along a seam at the bottom.
- Oral-B iO Series: Place the toothbrush on its charging stand, turn it about 45 degrees anti-clockwise against the charger until you feel the base cap unlatch. Gently bend the toothbrush to create a gap and lift the handle off. The cap might stay on the charger or attached to the handle. If attached to the handle, pry it off by hand.
- Philips Sonicare (many rechargeable models): Some models can be opened by firmly pressing the top end against a hard surface, causing the bottom cap to release. Others require prying clips along the internal wall of the handle casing with a flat-bladed screwdriver.
- Philips ONE (disposable battery): Insert a coin into the coin slot at the bottom and turn counter-clockwise. Gently shake out the old AAA battery. This is the simplest method.
- Slide Out the Inner Mechanism: Once the base is open, carefully slide out the internal electronic mechanism. Be mindful of any springs or small components that might fall out. For Oral-B, a spring is usually found at the bottom of the mechanism inside the copper coil.
-
Access and Remove the Old Battery:
- Locate the Battery: The battery (often cylindrical) will be nestled within the internal mechanism, typically connected to the Printed Circuit Board (PCB).
- De-solder Connections: For most rechargeable models, the battery will be soldered in place with tabs. Using a soldering iron, carefully heat the solder joints connecting the battery tabs to the PCB and simultaneously use a desoldering pump or wick to remove the molten solder. You’ll typically find two connections to the battery and possibly two to the motor. Ensure all connections are free.
- Remove the Old Battery: Once desoldered, carefully slide or pry the old battery out of its holder. Note its orientation (positive and negative ends) for correct installation of the new battery.
-
Install the New Battery:
- Choose the Right Battery: Double-check that your new battery is an exact match in terms of voltage (e.g., 1.2V for Ni-MH, 3.7V for Li-ion), size (e.g., AA or AAA equivalent, often 14500 for Li-ion), and chemistry. Ensure it has the correct soldering tabs if required.
- Insert New Battery: Place the new battery into the holder, ensuring the positive (+) and negative (-) terminals match the orientation you noted earlier. The tabs should align with the solder pads on the PCB.
- Solder New Connections: Carefully solder the new battery tabs to the corresponding pads on the PCB. Use just enough solder for a secure connection, avoiding excess heat that could damage the battery or board. Make clean, firm connections to ensure proper circuit flow and prevent shorts.
-
Reassembly and Testing:
- Reinsert Internal Mechanism: Carefully slide the electronic mechanism back into the toothbrush handle. Ensure that the power switch on the circuit board aligns perfectly with the external button molding on the handle casing. The rubber seal should also sit correctly to maintain waterproofing.
- Close the Handle: Firmly press or twist the base cap back into place until it snaps securely, ensuring a tight seal. For twist-lock designs (like some Oral-B), turn clockwise until it locks.
- Initial Test: Place the reassembled toothbrush on its charging cradle for a few moments. Look for charging indicator lights or a brief hum to confirm it’s receiving power and attempting to charge. If it doesn’t work, re-check connections and alignment. Some models may need a full charge cycle to re-energize internal chips.
Safety Considerations and Best Practices:
- Waterproofing: The integrity of the waterproof seal is paramount. If not reassembled correctly, moisture can enter and damage the electronics, or even pose an electrical hazard.
- Battery Polarity: Always match the positive and negative terminals correctly. Incorrect polarity can damage the toothbrush and the new battery.
- Soldering Skills: If you lack experience with soldering, consider watching tutorials or seeking assistance from an experienced individual. Overheating or poor connections can lead to damage or unsafe operation.
- Battery Handling: Lithium-ion batteries, in particular, require careful handling. Do not puncture, crush, or expose them to extreme heat. Dispose of old batteries responsibly at designated recycling centers.
- Professional Help: If at any point you feel uncomfortable or unsure about the process, it’s always safer to consult a professional electronics repair shop or consider replacing the toothbrush entirely.
Top Electric Toothbrushes for Longevity (Considering Battery Life)
While battery replacement is possible for some models, choosing a toothbrush known for its robust battery life can reduce the need for such intricate DIY projects. Here are some of the currently favored models, often praised for their performance and reliable power.
- Oral-B iO Series: These smart toothbrushes feature powerful magnetic iO technology and often come with long-lasting Lithium-ion batteries that can hold a charge for several weeks. While replacement requires technical skill, their initial battery life is impressive.
- Philips Sonicare DiamondClean/Prestige Series: Known for their sleek design and advanced sonic cleaning, these models boast excellent battery longevity, typically offering weeks of use on a single charge thanks to efficient Li-ion batteries.
- Laifen Wave: A newer contender, the Laifen Wave combines oscillating and sonic technology and is noted for its exceptional battery life, often lasting up to 30 days on a single charge, making it a convenient choice for travelers.
When selecting a toothbrush, consider models that explicitly advertise longer battery life (measured in days or weeks of continuous use), as this indicates a higher capacity and often a more durable battery chemistry.
Mastering Your Electric Toothbrush: Tips for Optimal Use
Beyond merely switching on your electric toothbrush, understanding proper usage and maintenance practices can significantly impact its cleaning effectiveness and prolong its lifespan, especially its battery.
Proper brushing technique with an electric toothbrush differs from manual brushing. Instead of scrubbing vigorously, simply guide the brush head slowly from tooth to tooth, allowing the brush to do the work. Focus on each tooth surface—outer, inner, and chewing—for a few seconds before moving on. Many electric toothbrushes come with built-in timers that alert you every 30 seconds to switch quadrants, ensuring you brush for the dentist-recommended two minutes. Additionally, if your brush has a pressure sensor, pay attention to its indicator (often a light or vibration) to avoid pressing too hard, which can damage gums and wear down battery life faster.
Crucially, maintaining your electric toothbrush’s battery health is vital for long-term performance. For Li-ion batteries, which are common in newer models, avoid regularly discharging the battery completely or keeping it on the charger 24/7 if not needed, as this can degrade its capacity over time. Instead, aim to keep the charge between 50-80% for optimal longevity. For older Ni-MH batteries, an occasional full discharge and recharge cycle can help mitigate the “memory effect.” Always store your toothbrush in a cool, dry place when not in use.
Finally, proper hygiene extends to the brush itself. After each use, rinse the brush head thoroughly under running water and let it air dry. Periodically clean the handle, especially around the charging contacts, to prevent grime buildup that can interfere with charging. Remember to replace your brush head every three to four months, or sooner if the bristles become splayed or frayed, regardless of your battery’s condition, to ensure consistent and effective cleaning.
Where to Find Reputable Electric Toothbrush Suppliers
When it’s time to purchase a new electric toothbrush or source replacement parts like batteries and brush heads, it’s essential to turn to trusted retailers and specialized suppliers. This ensures you receive authentic products, valid warranties, and reliable support.
For new electric toothbrushes, major electronics retailers, department stores, and large online marketplaces are convenient options. Look for authorized dealers of brands like Oral-B, Philips Sonicare, and other reputable manufacturers to guarantee product authenticity and warranty coverage. Health and beauty stores also often carry a good selection.
If you’re embarking on a DIY battery replacement, specialized online stores that focus on replacement parts for small electronics are your best bet for finding compatible batteries with the necessary soldering tabs. Websites dedicated to electric toothbrush parts or general electronics components often provide specific model-matching tools and guides to help you identify the correct battery for your device. Always prioritize suppliers with clear product descriptions, good customer reviews, and transparent return policies. Remember, choosing the right supplier for replacement parts is as important as choosing the right toothbrush itself.
“Extending the life of our everyday devices like electric toothbrushes isn’t just frugal; it’s a small but meaningful step towards a more sustainable lifestyle. Knowing how to perform simple repairs empowers us to reduce waste and appreciate the engineering within.” – John Smith, Electronics Repair Specialist
Conclusion
A well-maintained electric toothbrush is an invaluable tool for optimal oral hygiene, and a failing battery doesn’t have to spell the end for your device. By understanding the types of batteries, the benefits of each, and the detailed steps involved in a DIY replacement, you can confidently extend the lifespan of your electric toothbrush, ensuring it continues to deliver that fresh, clean feeling for years to come. While some repairs require a bit of technical skill and careful handling, the satisfaction of revitalizing your trusty brush and contributing to less electronic waste is truly rewarding.
Are you ready to give your electric toothbrush a second life?
Frequently Asked Questions
How do I know if my electric toothbrush battery needs replacing?
Common signs include a significant reduction in brushing power, the toothbrush dying quickly after a full charge, or the charge indicator light showing empty more frequently. If your toothbrush struggles to complete a two-minute brushing cycle, it’s likely time for a new battery.
Is it safe to change the battery in my electric toothbrush myself?
While it’s possible, DIY battery replacement comes with risks, including damaging the toothbrush, compromising its waterproof seal, or improper handling of lithium-ion batteries. Manufacturers typically advise against it, as it voids the warranty. Proceed only if you have the necessary tools and electronics repair experience, and always prioritize safety.
What type of battery do most electric toothbrushes use?
Most modern rechargeable electric toothbrushes use either Nickel-Metal Hydride (Ni-MH) or Lithium-ion (Li-ion) batteries. Basic, battery-powered models often use standard disposable AAA alkaline batteries, which are easily replaceable. The specific type and size will depend on your toothbrush model.
Can I just use any rechargeable battery for replacement?
No, it’s crucial to use a compatible replacement battery that matches the original’s voltage, physical dimensions, and chemistry (Ni-MH for Ni-MH, Li-ion for Li-ion). Using an incorrect battery can lead to malfunction, damage, or safety hazards. Look for batteries specifically designed for Electric Toothbrushes, often with pre-attached soldering tabs.
How can I prolong the life of my electric toothbrush battery?
To maximize battery life, avoid regularly letting Li-ion batteries fully discharge or keeping them on the charger 24/7. Aim to keep the charge between 50-80%. For older Ni-MH batteries, occasionally performing a full discharge and recharge cycle can be beneficial. Store your toothbrush in a cool, dry place.